Mastering the Arm Triangle Choke is a journey that combines precision, technique, and strategy. In this article, you’ll discover the essential steps and pro tips to execute this powerful submission flawlessly. You’ll learn how to position your body, apply the right amount of pressure, and recognize the perfect moment to finish the choke. Whether you’re a beginner or looking to refine your skills, this guide helps you master one of the most effective moves in Brazilian Jiu-Jitsu.
Mastering The Arm Triangle Choke
Have you ever wondered how to perfect the arm triangle choke? This technique, essential in both Brazilian Jiu-Jitsu (BJJ) and mixed martial arts (MMA), is a cornerstone for anyone serious about grappling. Whether you’re a white belt just starting out, or a seasoned practitioner looking to sharpen your skills, you’ve come to the right place. Let’s dive deep into mastering the arm triangle choke!

What is the Arm Triangle Choke?
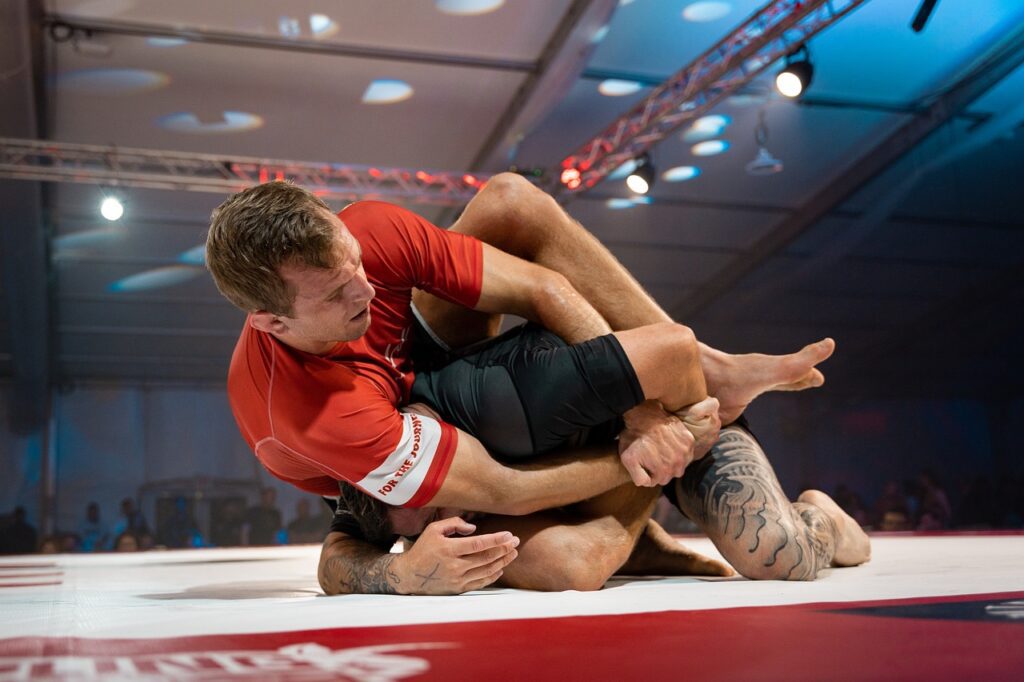
The arm triangle choke, also known as the head and arm choke, is a blood choke technique that compresses the arteries in the opponent’s neck, cutting off blood flow to the brain and inducing a tap-out or, in some cases, unconsciousness. Despite its seemingly complex nature, once you understand the mechanics, you’ll find it to be an incredibly effective and reliable submission.
Why Should You Learn the Arm Triangle Choke?
- Versatility: The arm triangle can be executed from various positions, making it a versatile tool in your grappling arsenal.
- Effectiveness: When applied correctly, it’s almost impossible for your opponent to escape.
- Control: It provides strong positional control, minimizing the risk of counters or reversals from your opponent.
The Mechanics: Understanding How it Works
Let’s break down the mechanics to understand why the arm triangle is so potent.
Compression
The arm triangle applies pressure to both sides of the neck, compressing the carotid arteries. The partner’s own arm and your arm squeeze together, closing off blood flow, leading to a quick submission.
Positional Dominance
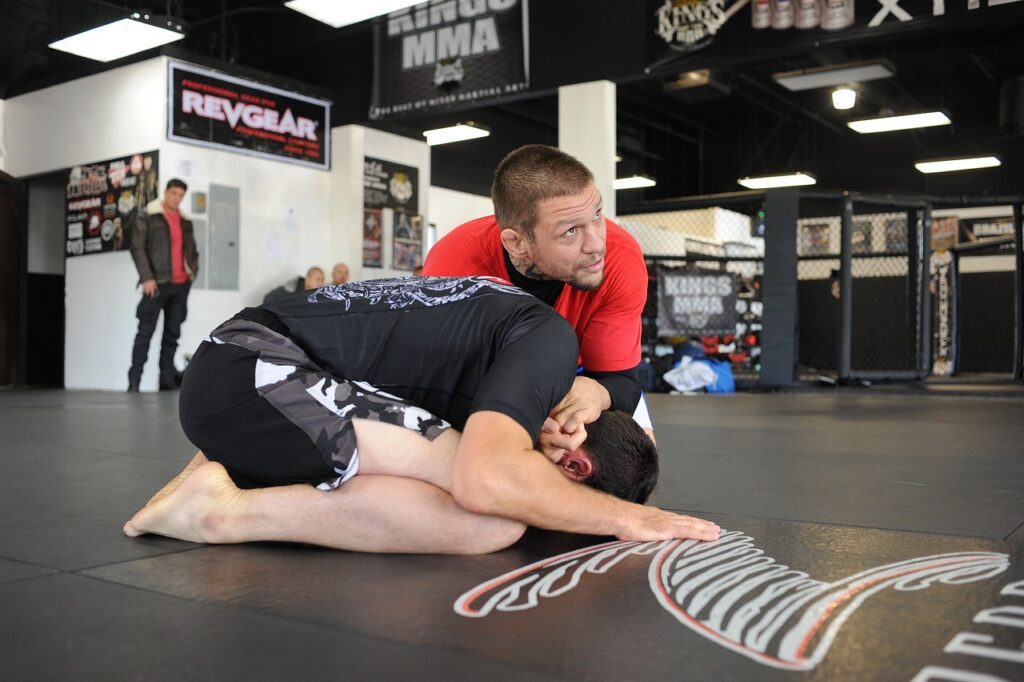
Executing the arm triangle usually requires you to achieve a dominant position, such as side control, mount, or even from within the opponent’s guard. This positional dominance not only makes the choke more effective but also reduces the risk of a counterattack.
Gravity and Leverage
Using your body weight to help apply pressure makes the choke more efficient. Leveraging gravity reduces the effort needed from your muscles, making it an excellent technique during longer matches when endurance might be a factor.
Steps to Perform the Arm Triangle Choke
Here’s a step-by-step guide to executing the arm triangle choke. We’ll break down each phase for clearer understanding.
Setup
- Achieve Position: Ideally, start from side control or a mounted position.
- Isolate the Arm: Push your opponent’s arm across their face to the opposite side, so it’s trapped against their own neck.
- Secure the Head: Position your head against the side of their neck on the opposite side to form the beginning of the triangle.
Application
- Hand Placement: Grasp your own bicep with your opposite hand. The other hand should be on top of your opponent’s head or shoulder to stabilize.
- Position Adjustment: Slide your body down to get more parallel with your opponent, ensuring no gaps exist between you and them.
- Apply Pressure: Squeeze your elbows together and push your weight down to compress the arteries and induce the choke.
Finishing
- Maintain Control: Ensure your opponent cannot escape by using pressure from your legs and body to hold them in place.
- Incremental Tightening: Gradually tighten the choke by inching your arms closer and applying more pressure until the opponent taps or goes unconscious.
Common Mistakes and How to Avoid Them
As simple as the technique might sound, several common mistakes can make or break its effectiveness.
| Common Mistake | How to Avoid It |
|---|---|
| Not Isolating the Arm Properly | Ensure the opponent’s arm is fully across their neck before proceeding. |
| Improper Head Position | Your head should be snug against the side of their neck, forming a tight seal. |
| Leaking Pressure | Maintain a constant, controlled squeeze to prevent the opponent from finding an escape route. |
| Incorrect Body Alignment | Slide your body to be more parallel to the opponent to maximize pressure. |

Variations of the Arm Triangle Choke
There are several variations of the arm triangle choke, each with its unique benefits.
Standing Arm Triangle
Useful for transitioning into a ground-and-pound scenario or against a cage in MMA.
Half-Guard Arm Triangle
A more advanced variation that allows you to control your opponent even from less dominant positions.
Reverse Arm Triangle
Executed from positions like north-south or from behind, this variation can catch opponents off guard.
Drills to Improve Your Arm Triangle Choke
Consistent practice and drills are essential for mastering any technique. Here are some drills to help you refine your arm triangle choke.
Drilling with Positional Isolation
Start in side control and focus solely on isolating the arm and transitioning to the choke. Repeat until it becomes second nature.
Flow Drills
Work with a partner to transition between different positions while maintaining control. For example, move from mount to side control to half-guard while keeping the arm triangle setup.
Resistance Drills
Have your partner resist at 50% intensity. This will give you a feel for adjusting your technique under pressure and making necessary tweaks.

Applying the Arm Triangle in Competition
Understanding the technique is only part of the battle. Applying it effectively in a live scenario or competition requires strategic thinking.
Strategic Timing
Knowing when to go for the arm triangle is crucial. Look for moments when your opponent is fatigued or distracted by other threats.
Mindful Transitions
Focus on seamless transitions between different positions. An opponent who sees an arm triangle coming is likely to defend against it more effectively.
Confidence and Patience
Believe in your training. Apply the choke confidently and be patient in tightening it. Rushing can lead to mistakes that allow your opponent to escape.
Frequently Asked Questions (FAQs)
To further enhance your understanding, here are some common questions and answers regarding the arm triangle choke.
How Long Does it Take for the Choke to Work?
Typically, the arm triangle choke can induce a tap-out in a matter of seconds if applied correctly.
Can the Arm Triangle Be Used in Gi and No-Gi?
Yes, it’s effective in both Gi and No-Gi settings.
What if My Opponent Has a Strong Defense?
Work on improving your setup phase and practice drills that increase your control and pressure application.
Is it Safe to Practice the Arm Triangle?
With proper instruction and safety measures, the arm triangle is safe to practice. Always ensure your partner taps out or verbally communicates if they’re in distress.
How Can I Increase My Squeeze Strength?
Exercises such as push-ups, bench presses, and grip-strength training can help improve your squeeze strength for a tighter choke.
Conclusion
Mastering the arm triangle choke can be a game-changer in your grappling journey. By understanding its mechanics, avoiding common mistakes, and regularly practicing different drills, you’ll be well on your way to making this technique a reliable part of your skill set.
So, the next time you find yourself in a dominant position, remember the principles you’ve learned here. Whether you use it in a competitive match or simply during class, mastering the arm triangle choke will undoubtedly elevate your grappling game. Happy training!

